Microsoft Word has numerous capabilities, including tools that simplify formatting and page layout. Long Word documents that are improperly formatted can be difficult to read. Using section breaks is one technique to format them and make the material simpler to read.
This tutorial will teach you how to rearrange your Word pages and improve the readability of your document using section breaks. We’ll also examine several forms of section breaks and demonstrate how to eliminate them.
What Is a Section Break?
Section breaks are formatting elements that separate a document into sections, as their name suggests.
There are various forms of section breaks; each will provide you greater control over your work and make it more readable and visually appealing. For instance, they can assist you format your work, leave white space, or create columns on a page.
Difference Between Section and Page Break
When you insert a page break in a Word document, the next text will always begin on the following page. Page Break is an excellent tool for beginning new chapters or sections in a book or article.
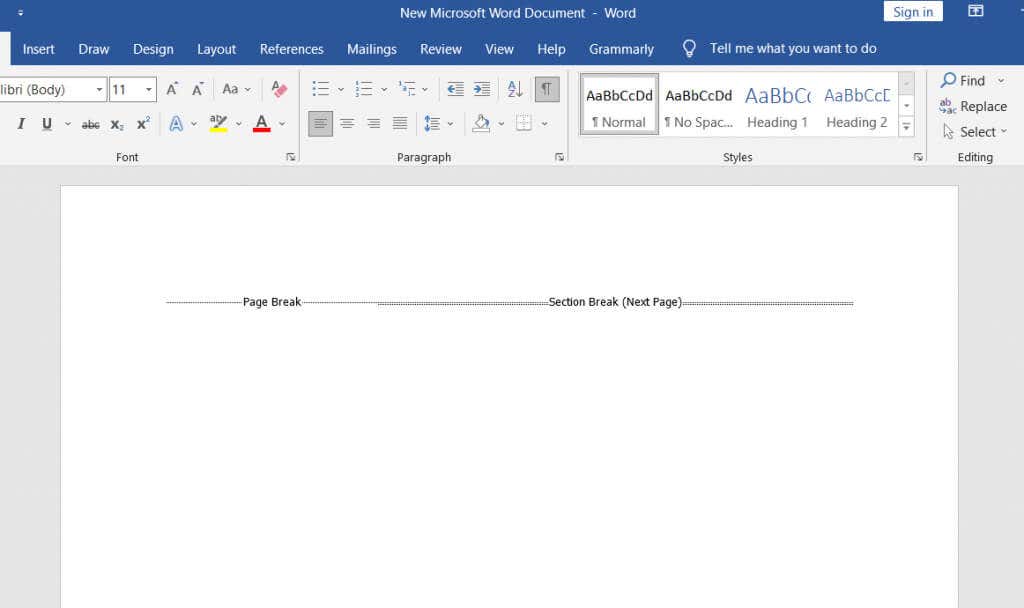
Page breaks are distinct from section breaks. The following content does not always begin on a new page. Instead, the text can continue on the same page, resulting in a tidier, better-organized appearance.
Also Read: How to Spell Check in Word?
Types of Section Breaks
There are four types of section breaks in Microsoft Word.
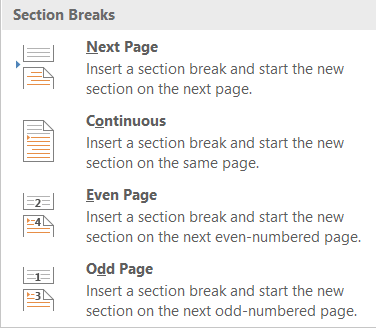
1. Next Page Section Break
All text to the right of the cursor (which you can position wherever you like) will be moved to a new section on the following page. All of the formatting you applied to the transferred text will be carried over to the new section.
2. Continuous Section Break
On the same page, a Continuous Section Break will establish a new section. This means that two distinct texts with differing formatting might exist on the same page.
3. Odd Page Section Break
Similar to the Next Page button, the Odd Page button will change the text to the next odd-numbered page to the right of the cursor. This means that if you are working on page 5 of a document and insert an Odd Page Section Break, your text will be moved to the top of page 7 and page 6 will be left blank. This is especially useful for producing new book chapters, as they typically begin on pages with an odd number.
4. Even Page Section Break
The Even Page Section Break is identical to the preceding section break, only it applies to even-numbered pages. If you are now on page 6, the document will automatically continue on page 8, leaving page 7 blank.
Also Read: How to Find iphone in Find My iPhone?
Types of Page Breaks
It is crucial to comprehend the distinction between section and page breaks, as well as when to employ each. In Microsoft Word, there are just two Page Break types, yet they provide drastically varied formatting outcomes.
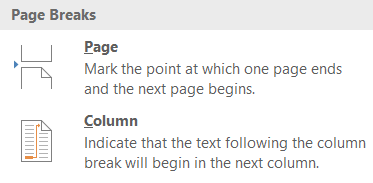
1. Simple Page Break
A simple page break will shift the content to the immediate right of the cursor to the next page. It makes no difference whether the page has an odd or even number.
2. Column Break
A column break separates columns in a document. All text to the right of the cursor will be moved to the top of the next column. You can have as many columns as you like, but you may want your document to appear neat and organised. Reading more than three columns can be difficult.
How to Insert Section Breaks in a Word Document
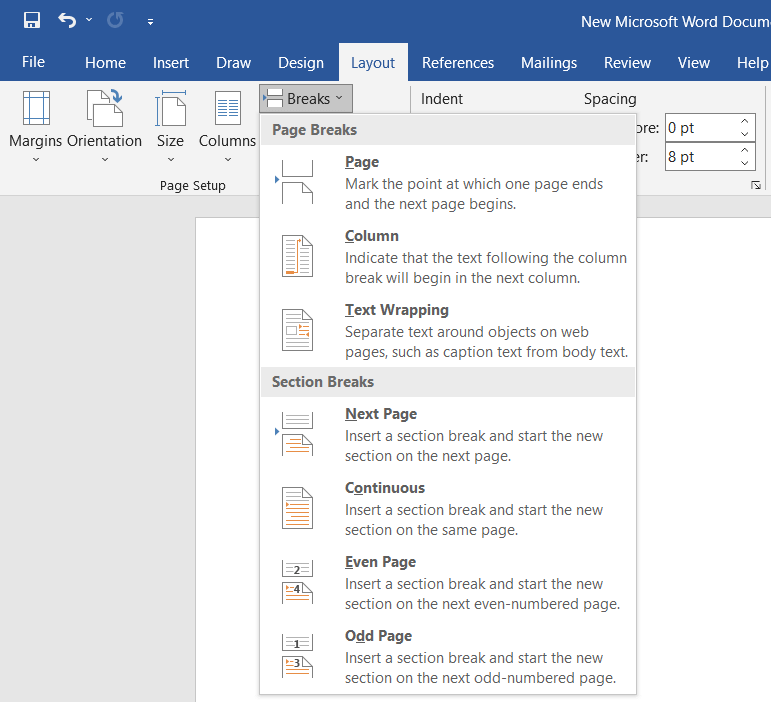
After determining the sort of section break required, putting it into a Microsoft Word document is simple. Place the cursor precisely where you need to divide the document, then navigate to Layout, click on Breaks, and select the desired section or page break from the drop-down option.
Additionally, there is a keyboard shortcut for swiftly inserting page breaks into a document. Once the cursor is in the desired location to insert a page break, hit Ctrl + Enter.
Also Read: How to Use on your iPhone?
How to View Existing Section Breaks
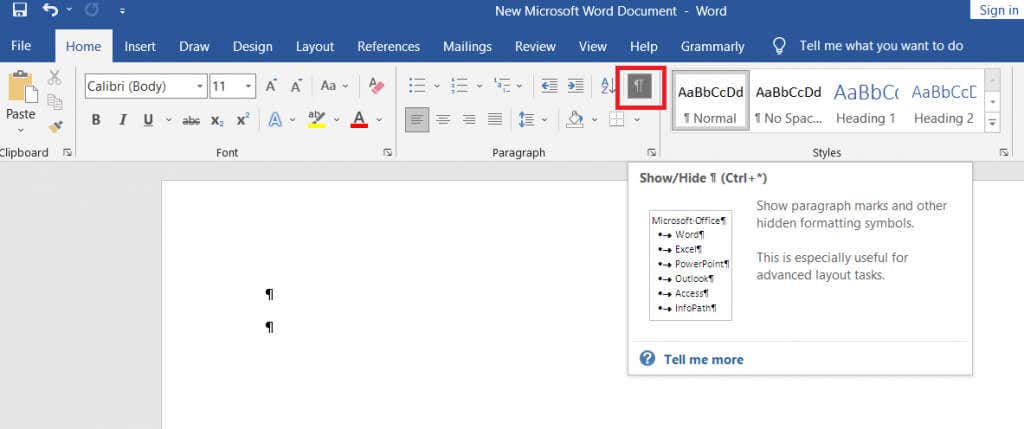
In Word documents, the section and page breaks are invisible. You can view their effects, but you cannot view them as symbols by default. Because the default view only displays what will be printed, this is the case.
When composing, revising, and formatting a document, you will need to view the various parts, such as paragraph marks, space marks, section breaks, and page breaks. To view all of these elements, select the Home tab and then click the Paragraph button to display all of the paragraph markers.
How to Delete Section and Page Breaks
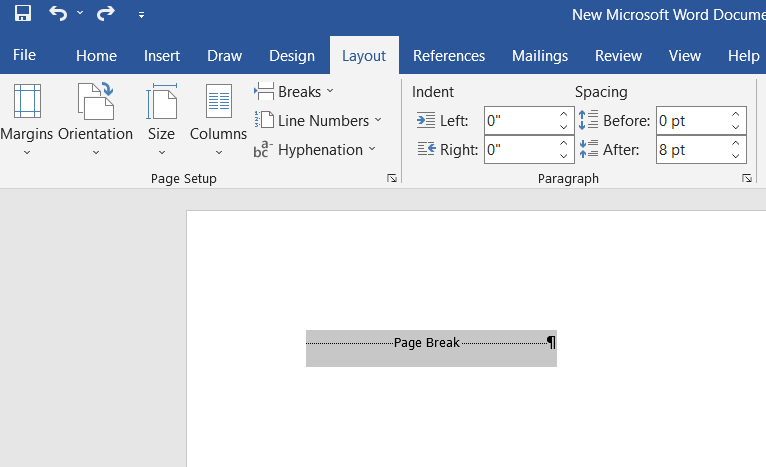
Displaying all section and page breaks is the first step in eliminating them. However, you must view them in order to delete them.
To eliminate section breaks, simply highlight them and press the backspace or delete key on your computer. To choose, click three times directly on the page or section break or place the cursor after it.
Remember that if you delete a section or page break, the text of that section will lose its formatting and adopt the formatting of the following section.


