After installing a microphone on Windows 10, it must be configured. This involves adjusting audio levels, input kinds, and ensuring that the sound is clear. If you’re setting up for gaming or streaming, you may also want to test your microphone’s audio effects.
Therefore, here’s how to test your microphone before using it on Windows 10:
1. Windows 10 Sound Settings
The initial step is to examine the Windows 10 Sound Settings, a collection of all audio and microphone-related options. To access Sound options:
- Input sound in your Start Menu search bar, then select the Best Match.
- After the Sound menu opens, scroll down to Input. Make sure your microphone is selected as the default input device. Use the dropdown menu under Choose your input device to make the change to a different microphone option.
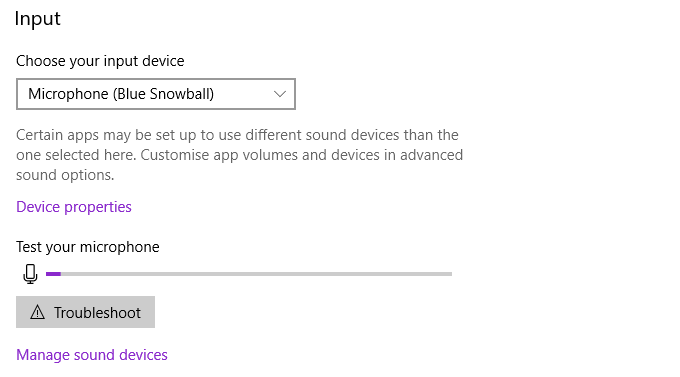
Here, you can modify a limited number of microphone characteristics. Choose the Device’s characteristics. This menu allows you to rename your device, disable the microphone, and modify the volume of the microphone. Depending on the sort of microphone you have, you may also have the option to increase its volume here.
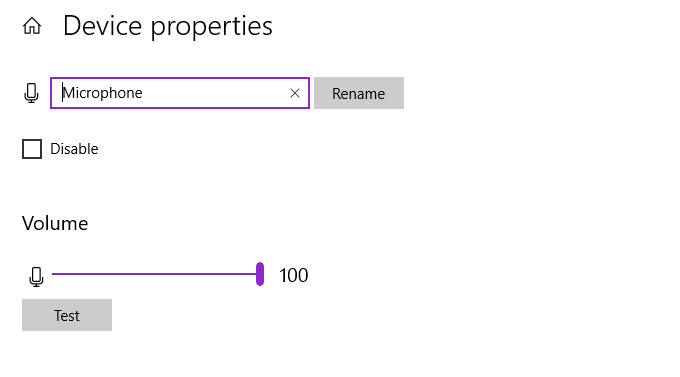
Nevertheless, new interface does not offer as many microphone management and configuration options as the “classic” settings menu. Thus, if you want more possibilities, see the section below.
Also Read: How to Password Protect Folders and Individual Files on Mac?
2. Sound Control Panel
Windows 10 began the transition from the old, familiar Control Panel to the new Settings interface. The redesigned Settings menus are optimised for touchscreen devices and consolidate several settings into streamlined menus. But, there are still some settings that have not fully migrated to the new Settings, so you must return to the Control Panel to find them.
- Acoustic Echo Cancellation: Reduces echo noises within your local environment.
- Far Field Pickup: Can improve recording quality when further away from the microphone.
- Keystroke Suppression: Attempts to suppress noisy keystrokes.
- Beam Forming: Enhances input from the microphone, suppressing noises outside the range.
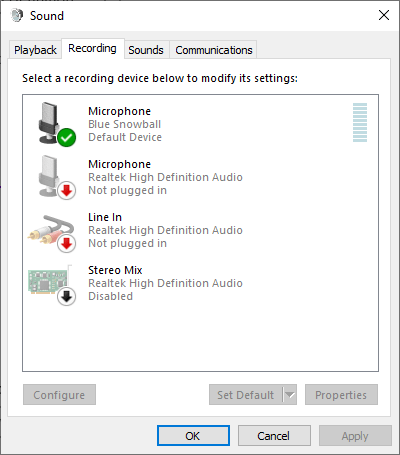
From the Windows 10 Sound Settings menu, pick Sound Control Panel from the menu in the upper-right corner, and then select the Recording tab. Or, you can launch the Run dialogue by pressing Windows Key + R, then entering mmsys.cpl and pressing OK.
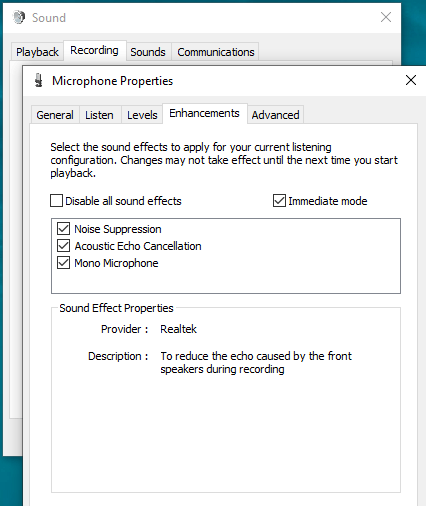
Choose Properties by right-clicking the microphone icon. A new window with multiple tabs will appear. Go to the Enhancements tab. These settings pertain to microphone amplification, audio suppression, and additional functionality. The improvements you see depend on the microphone you use.
This menu also contains choices for several types of microphone enhancements. Experiment with the Enhancements until you discover a level of input that meets your needs. The Sound Control Panel and microphone improvements are effective methods for reducing microphone sensitivity.
3. Which Apps Can Use Your Microphone?
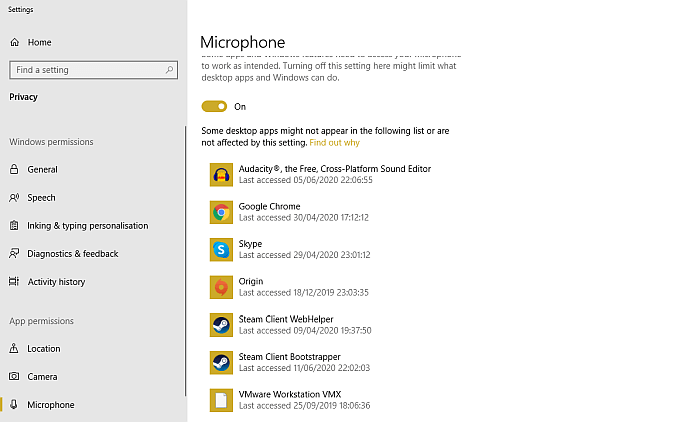
You should occasionally consider which applications have access to your microphone. You do not want any unexpected apps to listen in on your daily activities, especially if your microphone is connected in and located on your desk.
- Input privacy in your Start Menu search bar and select the Best Match.
- Select Microphone from the left-hand list.
- Scroll down and assess the apps with access to your microphone. If there’s anything you don’t want to grant access to, tap the toggle to switch it off.
Also Read: 8 Ways to Fix Unfortunately Settings Has Stopped on Android
4. Equalizer APO with Peace GUI
To fine-tune the sound of your microphone, you need require third-party audio software. While there are other choices available, Equalizer APO is one of the most user-friendly and is also free. Equalizer APO is a command-line application by default, but you may install a number of free graphical user interfaces (GUIs) that make the software much easier to use.
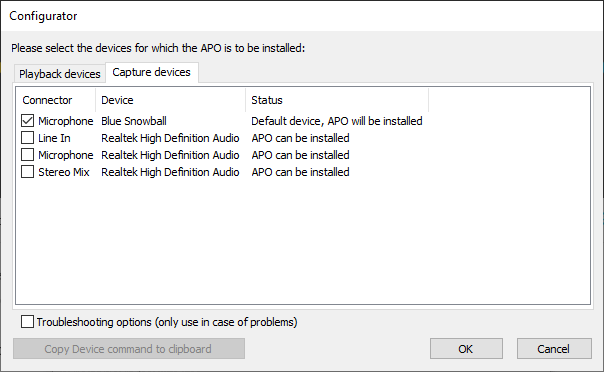
- Download and install Equalizer APO. During the installation process, you’ll select your Playback and Capture devices. For example, I choose Speakers from the Playback tab and Microphone from the Capture tab. The Capture tab will display the name of your microphone, so you know which option to select.
- Now, download and install Peace Equalizer. You can only install Peace after the Equalizer APO installation completes. If you attempt it first, it will fail. Once the installation completes, select Start Peace (otherwise, you can find Peace in your Start Menu).
When Peace loads, you must select between the Basic and Complete interfaces. The Full interface provides more configuration choices than the Basic version, giving you better control over your microphone output.
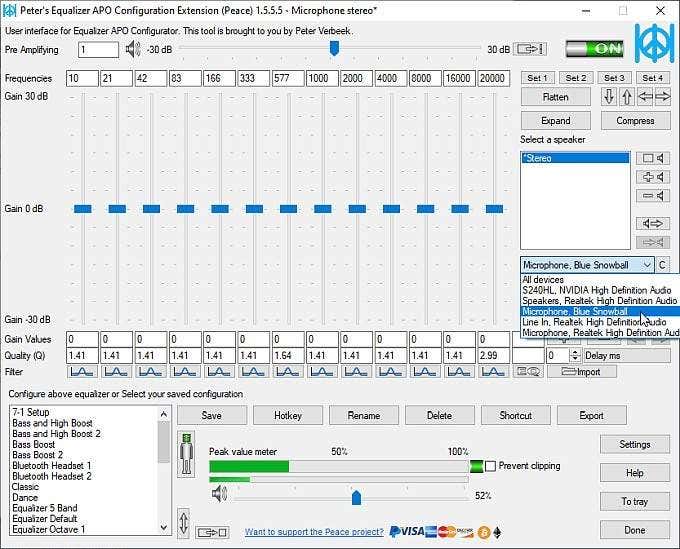
Choose the input for your microphone from the dropdown menu. Now, you can adjust the equaliser levels until you reach the desired output levels. You can also increase the volume output using the amplifier bar located at the top of the window.
When you have found the optimal microphone volume, select Save, name your configuration, and select a tray icon to display when the configuration is active. This final step is optional, but useful if you want to quickly verify that your setting is active.
5. Speech Recognition
Windows 10’s Voice Recognition is another method for testing your microphone. You may use your voice to operate your computer with Speech Recognition. Also, the setup process configures your microphone, which is a plus.
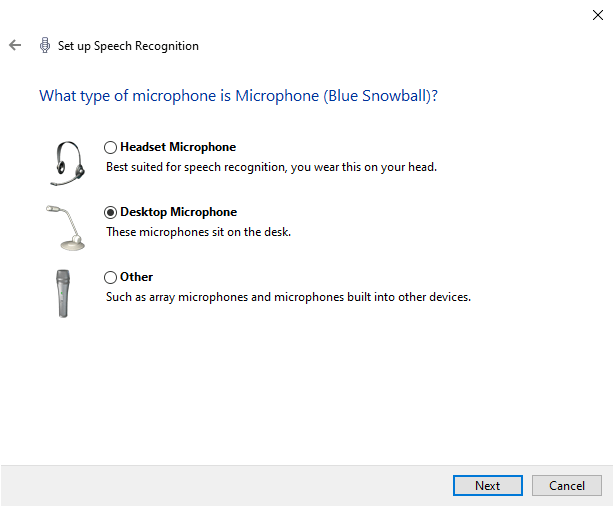
- Input speech recognition in your Start Menu search bar and select the Best Match.
- Choose your microphone type from the list, then continue.
- Now, you’ll speak a test sentence to configure the microphone. You may need to move your microphone around your desk to ensure it hits the correct level.
- The next page considers speech recognition accuracy. Windows 10 can analyze your documents and emails to improve speech recognition, tuning into your common phrases. If you don’t want Windows to analyze your documents and emails, select Disable document review.
- Next, choose what happens when you say Stop Listening. If you select manual activation, you must manually switch on speech recognition whenever you want to use it. If you select voice activation, Windows 10 will listen for your Start Listening command before activating.
- Finally, choose whether you want to Run Speech Recognition at start-up. Switching this option on will allow speech recognition to load with the operating system, meaning it will always be available when you need it without having to switch it on manually.
Also Read: How to Fix USB Tethering Not Working in Android?
Test Your Microphone Configuration
Five simple ways for checking your microphone settings have been shown. Certain options are superior for maximising your output, whereas others evaluate the microphone’s functionality. You are now aware of how to test and configure your microphone before to use.


